Monday, December 29, 2008

Fresh Onions


Fresh Onions
Originally uploaded by monkeycat!.
One of my favorite aspects of Davis, CA is its Farmer's Market. These onions came from a farm near Lodi or Esparto (which are not particularly close to one another), if I remember correctly. These went into a leek and onion tart, modified from this recipe.

Monday, December 22, 2008

Twilight in Davis


Twilight in Davis
Originally uploaded by monkeycat!.

Friday, December 19, 2008

Yeast Rolls


Yeast Rolls Proofing
Originally uploaded by monkeycat!.
I have been reading a bread blog for a while now called The Fresh Loaf, and while I don't participate (shame on me), I do enjoy the sharing of bread recipes, experiences, and feedback that exists on the site.

I picked up the recipe for these rolls submitted by Eli on the Fresh Loaf post and gave them a try. They are wonderful, tasty, and truly easy rolls to make.

I made a few substitutions, so below is my version of the recipe.

Yeast Rolls
adapted from The Fresh Loaf

250 g bread flour
244 g AP flour
65 g sugar
5 g instant dry yeast
5 g salt
50 g egg, beaten (I think that is one egg.)
195 g soy milk
50 g vegetable shortening
50 g water

Combine the flours, yeast, and sugar in a bowl, add water. This mixture is very, very dry. Its ok. Let it sit for as long as it takes you to do the next part.

Beat egg, shortening, and salt, with the milk. The shortening did not totally disperse for me, but stayed as lumps. Its ok. Add the wet mixture to the dry mixture and stir to combine. It should now look like a wet, sticky dough.

Turn out onto a floured counter and knead for 12-13 minutes. The dough will be smooth, but tacky. Place in oiled bowl and let rise ~2 hours.

Once after 2 hours, the dough should have doubled in volume. If it hasn't, let it sit a bit longer, or proceed, your choice. If you have come this far, you must have a kitchen scale, so using the scale, cut the dough into 1.75-2.00 oz (50-60 g) pieces and form into balls. Let the balls proof (as in above photo) for 1-2 hours under a towel. The dough is ready when you poke a dough ball and the indentation slowly comes about half way back out.

Bake in a 375ºF oven for 10-12 minutes, or until the tops get a nice brown. Don't pull them out too early; your patience will be rewarded with a nice crunchy crust and a fluffy interior.

Wait until the rolls have cooled, about 30 minutes, to get the optimal texture. I couldn't wait (I ate 5 straight from the oven) and wish I had.

Tuesday, December 02, 2008

Single Serving Lunch - Spaghetti alla Carbonara


Spaghetti alla Carbonara
Originally uploaded by monkeycat!.
I decided to make today's lunch in the same manner I decide to make many meals - by asking myself "What is in the fridge?"

We have:
fridge: eggs, Parmesan cheese, bacon.
cupboard: pasta, olive oil, salt, pepper
garden: parsley

All the ingredients necessary for Spaghetti alla Carbonara. What about cream, you might ask? No cream in carbonara for me.

Single Serving Spaghetti alla Carbonara
Adapted from Tyler Florence

1 slice of bacon
1 tbsp olive oil
1 egg
1 handful freshly grated Parmesan
1 handful of parsley, chopped
1 pinch salt
1 pinch pepper
1 big pinch garlic powder (no garlic on hand, unfortunately) or 1 clove, chopped
1 bunch of spaghetti judged to satisfy your appetite

Boil water for pasta, add salt. At the same time, heat up oil in skillet to about medium high. Add pasta to water. Once the pasta is going, we go to work. Chop up bacon and add to oil, let fat render and keep cooking until the bacon is crispy - about 5 minutes. Add in garlic (1 clove chopped, if you have it) or garlic powder. In a measuring cup or small bowl, whisk together egg and cheese until well mixed.

When the pasta is al dente (about a minute before you would call it done-done) use some kitchen utensil to get the pasta into the skillet without throwing away the pasta water. Toss pasta through the oil to get it nice and coated with bacony goodness. Once the pasta is coated and and the sizzling changes from a water boiling sizzle to a oil frying sizzle, take the pasta off of the heat. Slowly pour the egg-cheese mixture over the top, careful not to let it hit the bottom of the pan. Start to stir the egg mixture into the pasta. The goal is to get the egg to cook without scrambling. If the pan was left on the heat, scrambling would commence forthwith.

Once the sauce comes together, add the parsley and give a final mix. If the sauce is too stiff, add some starchy pasta water, 1 tsp at a time until you are happy with the consistency.

I like this recipe because it is made from one of each ingredient. It has nice recipe-symmetry.

How we learn to smell and the use of wine tasting notes.

I have been reading a lot of posts (NYTimes, for example) lately about wine tasting and its related art - tasting note poetry.

I will be the first to admit that tasting note poetry can go overboard, stepping into the realm of ode, or possibly love sonnet. But there is a profound usefulness to tasting notes: They provide a vehicle for sharing an inherently personal experience.

Like sight and sound, each person has a slightly different genetic makeup coding for the proteins and receptors related to smell. Each person has a unique-to-them experience when evaluating the flavors in the glass (See Thorngate, 1997).

Just like any language, in order to communicate wine tasting experiences effectively, there needs to exist a shared set of rules under which the communication takes place - the grammar and vocabulary of wine tasting notes. As young children we took vocabulary tests, an exercise designed to associate words with meanings by rote memorization. A similar vocabulary test takes place when learning to communicate wine experience. Odorants (smells) and their identity are associated with one another through rote memorization.

In order to pull strawberry, blackberry, raspberry, blueberry, or olallieberry aroma out of a wine, a firm representation of the aroma of these berries needs to live in the brain. To form this association, aroma standards are produced according to various recipes (Noble et. al, 1987) and then repeatedly smelled and identified until the association sticks.

Therefore, if the appropriate work is done to learn the aromas, the learn the vocabulary of wine, then tasting notes become quite useful. The assumption required for usefulness is that the note writer and the note reader are speaking the same language.

The photo above was taken during the final exam of "Sensory Evaluation of Wine" taught by Dr. Heymann at UC Davis. This is a required course for all graduates of the UC Davis Viticulture and Enology program. The students in the class have to identify approximately 50 aroma standards out of numbered, black tasting glasses. As a graduate of the program, I can say that it is not an easy task. But, for all of the work it takes to learn the aromas, I am confident that when I speak to others about wine aromas who have had the same wine language training, we are communicating effectively a shared wine tasting experience.

Saturday, November 15, 2008

Back to Cooking, Back to Blogging


Spaghetti and Meatballs
Originally uploaded by monkeycat!.
My fun, hectic ride as a harvest intern came to an end today. Three months went by quickly and while I am saddened that I will not be working with Erin, Josh, Phil, and David any longer, I am glad that I will have some time to catch up on some cooking.

Last week received a call while cleaning crushpad equipment to come back to the office - "the meat had arrived." The rumblings were true - a whole cow was purchased and I was to go home with an intern's share of meat - a few pounds of ground beef and a few pounds of stew meat.

This first dish to come of the cow caché is Spaghetti and Meatballs - a quick, tasty dish that allows the flavor of the beef to shine - though in my version it is tempered with a turkey to give it a lighter touch. Also, these meatballs are baked, again for lightness.

Spaghetti and Meatballs
adapted from Baked Meatballs on The Crepes of Wrath.

1 lb. ground beef
1 lb. ground turkey
1.5 eggs, beaten (or 3/4 of two eggs beaten. If you can find a half egg, all the more power to you.)
2 tsp dried parsley
1.5 tsp dried oregano
2 tsp garlic powder
1.5 tsp salt
1 c panko breadcrumbs, divided
1/2 tsp cayenne pepper
Parmesan cheese, if you like

3/4 lb. spaghetti
Pasta sauce of your choosing (homemade or a nice jar of sauce)

Heat oven to 400ºF. Line a sheet pan with parchment paper or grease the sheet with some cooking spray. Put a pot of water on to boil.

Combine the ground beef and ground turkey, egg, 2/3 of bread crumbs, herbs, and spices in a mixing bowl. Blend together with hands, until everything is together, but not so much that things start to heat up and the meat gets overworked.

When the oven is ready, make golf balls out of the meat mixture - or whatever size you want. Roll in the remainder of the breadcrumbs and place them on the sheet. Bake for 20 minutes.

In the mean time, once the water comes to a boil, salt the water and add the spaghetti. Cook until it suits your palate - I like al dente (just a bit of bite in the middle of the noodle). If your sauce is cold, heat it up in a saucepan. If it is room temperature, it can just be added to the drained pasta.

Drain the pasta and combine with the sauce. Place a few meatballs on top. If you like cheese, add some fresh grated Parmesan.

I made 15 large meatballs out of this recipe, so there are left overs, which can only mean one thing - meatball sandwiches!

Hopefully I will have more time now to get back to cooking and posting.

Sunday, August 17, 2008

Pasta with Tomatoes and Zucchini

When zucchini and tomatoes are in season (summer), this is by far my favorite easy meal to make. It has been adapted from so many different sources, re-jiggered as I read new recipes so many times that I don't even know when I started making it. I do know, however, that it had to be within the last three years - before then, I had not had a tomato worth eating. Moving to Davis and discovering the homegrown tomato, I now know what tomatoes should taste like.

Pasta with Tomatoes and Zucchini
enough for one

1/2 lb linguine, or other straight pasta
2 handfuls cherry/grape/Sun Gold tomatoes, halved
2 cloves garlic, sliced thin
1 zucchini, quartered lengthwise, then cut crosswise into 1/3 inch pieces
Red pepper flake, added to desired spiciness (I like a lot)
Olive oil, salt, and pepper
Tarragon (or whatever herb you prefer)

Put water on to boil. Let it get pretty close to boiling, add some salt, then recover and start the sauce.

Heat a few teaspoons of oil in a medium skillet over medium-high heat. When the oil is hot, add the zucchini. Let it cook until it starts to brown. Add the garlic and red pepper flakes, turn down to medium, and stir while cooking for 30-45 seconds. When the garlic just starts to color, add in the tomatoes. Remember- leave a few to snack on while the sauce is cooking! When the water comes to a boil, add in the pasta.

Once the tomatoes have been sizzling for a few minutes and start to slip out of their skins and break down a bit, turn the heat down to just below medium. As the sauce starts to run out of liquid, add about a quarter cup of boiling pasta water to the sauce. There is something that happens when pasta water is added to an oil-based sauce - it is as if it forms an emulsion of sorts and forms a thick-ish sauce - certainly thicker than either oil or water.

Let the sauce continue to simmer. When the pasta is al dente, turn the sauce back up to high, add in the pasta with a touch more water and mix everything together. Once the sauce has adhered to the pasta, it's ready to go. Add pepper and more salt, if necessary, to taste.

There you have my favorite summer meal.

Sunday, August 03, 2008

Pear Preserves


Pear Preserves
Originally uploaded by monkeycat!.
One of the great advantages to working in Wickson Hall, an advantage that we will forfeit when we move to the new Robert Mondavi Institute building later this week, is that there are often surplus fruits and nuts available to take home. I don't mean one or two apples here and there. I mean 200 lbs of extra apples. Or a trash can full of walnuts. Or unripe pears.

A similar jettison of excess food led to the Walnut Butter that I made at the beginning of this year.

I took home about 5-6 lbs. of pears, which needed to sit in the refrigerator for a week, presumably to induce ripening. After I took them out and ate a pear or two, I realized that between Antonia and I, there is no way we would be able to eat 6 lbs of pears before the pears spoiled. The only thing that I could think to do was to can the pears.

This is my first foray into the world of canning. It is a tradition that suburban youths like me, who grew up in Irvine, CA, only heard about when hearing stories about the farm. So how was I to learn of canning? I had the greatest canning resource of all at my fingertips: The Internet.

I settled on the official-sounding National Center for Home Food Preservation website. How much more to-the-point could a website name be?

You can click through to see the procedures in full, but the basic outline is:

1) make a syrup.
2) add pears to syrup, boil until they are soft.
3) Add lemons to increase the acid to act as a preservative.
4) Sterilize mason jars.
5) Fill mason jars.
6) Process mason jars.

It was Step 6 for me that was the least obvious. Up until 6, skipping any step would lead to something other than pear preserves. I had the idea that once the food was placed in the mason jar, the process is finished. I was wrong. The jars are boiled after they are sealed, I think to kill any microbes that are present.

The one thing I will do before I can again is to get the correct equipment. The jar tongs are a must - I don't want to get boiling water on my hands and face a second time. In spite of this small setback, I have discovered an activity that has opened up a new world of cooking for me... and as a bonus, I can eat pears, processed at the height of their flavor and maturity, in the middle of winter. If only these last so long...

Saturday, August 02, 2008

Pesto Scrambled Eggs


Pesto Scrambled Eggs
Originally uploaded by monkeycat!.
Pesto is a wonderful food. In fact, I am going to make pesto today for the second time in three days. Why am I making pesto again? Well, there are two reasons. 1) The basil at the Davis Farmer's Market looked amazing. I used all of my pesto eating pesto elbows with sausage and and pesto scrambled eggs.

As you can see here, pesto scrambled eggs is a wonderful food. Especially if topped with Parmigiano-Reggiano cheese. Another wonderful start to a day. If you are looking for something to do with you eggs on a weekend for breakfast, I highly recommend this dish.

The perfect four ingredient food


BLT
Originally uploaded by monkeycat!.
What is the perfect four ingredient food? Lets go down the list:

The perfect one ingredient food: The is one is obvious and taken a bit for granted. If you had to choose only one one-ingredient food, what would it be. It would be boring. It would be plain. It would be in most cases flavorless (if you are lucky). The perfect one ingredient food is water.

The perfect two ingredient food: What is the first thing you do when you wake up in the morning? Is it brushing your teeth.... no. Is it eating breakfast.... no. Is it checking your email... sadly, for large segment of the population (including myself on many a day)... yes. But, what is the most important first activity one can do in a day? That's right - drink that perfect cup of coffee. Your programmable coffee maker is your most loyal servant. It has waiting, at my case at 7am, the most indispensable nourishment of the day: The perfect two ingredient food is the first cup of coffee.

The perfect three ingredient food: This one is simple yet deceiving, mainly because it is taken for granted. I am in the process of making this perfect food as I write this post. What is it? Here is a clue. Water. Flour. Yeast. That's right: The perfect three ingredient food is bread.

Now, to the purpose of this treatise. What is the perfect four ingredient food? After four ingredients, the outcomes are endless. Five, six, ten, twenty ingredients - there is no end in sight... you can eat curry at this point! So what is the perfect four ingredient food?
...
.....
........
..........


The BLT. Bacon. Lettuce. Tomato. (Bread). In this case, homemade baguette, cluster tomatoes, romaine lettuce, and Niman Ranch Bacon. Honestly, this is one of the world's perfect foods. Although it is quite hot in the summer, cooking bacon for a BLT is a pleasure - as it sizzles and hops in the pan, one can only envision the wonderful end to its life. The smell will permeate your house for hours after the consumption of the perfect food.

The BLT. A wonderful food.

Scrabble


Scrabble
Originally uploaded by monkeycat!.

Friday, July 25, 2008

Baking Baguettes


Baguette
Originally uploaded by monkeycat!.
There is something about summer that leads me to bake. One might figure that winter is an appropriate time to get into baking: its cold outside, the oven can warm the house, generate the beautiful smells of bread.

Such is not the case for me. I bake in the heat of summer. 95+ºF outside and I turn the oven on to 500ºF. I can't exactly explain why, except that summer is when I have the time to coordinate my day around the bread.

That's the thing with bread: The actual hands-to-dough work is not all that intensive, especially if a mixer is employed. It is the waiting time: 16 hours, 20 minutes, 3 hours, 1 hour, 25 minutes - that force baking to command scheduling priority.

Today I did a bit of baking using a new recipe that I found on an amazing website: The Fresh Loaf.

Last night I started with the poolish and pate frementee (two methods used as bread starters. Usually a recipe calls for one or the other. This recipe called for both). This morning I mixed, let the dough rise, shaped, and baked. I came out with three loaves, two of which are ready for photos. Above is the baguette. Below is a batard - something a little bit longer. I think the batard is going to make wonderful sandwiches over the next two days.

Now, what can I bake this weekend???


Batard
Originally uploaded by monkeycat!.

Wednesday, July 23, 2008

The closest I have come to recreating a Cheeseboard pizza


Pizza for dinner - 7/23/08
Originally uploaded by monkeycat!.
How can I convey to you, reader, how good this pizza was (and I say was, because it is gone - I ate the WHOLE pizza. All 8 slices.)?

As the title of this post states, this is the closest that I have ever come to recreating a pizza from Cheeseboard. Now, if you have ever heard me wax poetic about The Cheeseboard and you know me, you are aware that I do not have a large enough ego to even attempt to recreate one of their pizzas. This is just a "pizza in the style of Cheeseboard." Cheeseboard pizzas are truly a heaven on earth.

I have recently returned to bread baking thanks to Peter Reinhart, and others. 4-6 baguettes every week, plus pizza. The pizza recipe comes from the King Arthur flour website. Now, if I were able to afford KA flour, I would buy it every time. Unfortunately, such is not the case. Tonight Antonia and I had pizza made from the KA .

The routine at our house when it comes to pizza is that each of us makes our own pizza. I divide the dough recipe in half and we bake two pizza: one for Antonia, and one for me. We each design our own.

Tonight, Antonia's was comprised of: tomato sauce, meatballs, onions, mushrooms, scallions, and zucchini.

Mine, as the title of this post suggests, was good enough mention Cheeseboard in the same sentence.

My pizza was topped with: Roma tomatoes (home grown), roasted zucchini (home grown), garlic (home grown), mushrooms, sauteed red onions, scallions, Gruyere, and Mozzarella. This was a truly sublime pizza. The vegetable:cheese ratio was perfect. The crust was great thanks to 500ºF on a pizza stone for 12 minutes.

Now, with such a tasty pizza, only a good bottle of wine could make things even better, and such was the case:
2005 Hanzell Chardonnay, courtesy of our friend Wynne.

This was truly one of the nicest meals that I can remember making at home: we ate outside, it was warm, Antonia and I had great conversation - everything was perfect.

To top the whole experience off, I was fortunate enough to have Stakes Is High by De La Soul playing while I wrote this, an album which contains one of my favorite songs: Itzsoweezee (Hot).

Enjoy your dinner, enjoy your pizza, enjoy your wine!

Sunday, July 20, 2008

train track line 2


train track line 2
Originally uploaded by monkeycat!.

Friday, July 18, 2008

Egg Salad Sandwich


Egg Salad Sandwich
Originally uploaded by monkeycat!.
I am going to forgo posting about our wedding and honeymoon for just a little bit longer in order to write about one of my favorite foods - the egg salad sandwich.

Why do I like egg salad sandwiches? I believe that I like these sandwiches for much the same reason everyone likes them: my mom made egg salad often when I was a young child. As a result, eating them is both tasty and nostalgic.

When Antonia and I were deciding what to have for lunch today, we were close to making a tofu stir fry over rice. This plan made sense except for one glaring oversight: I had made baguettes this morning. A brief aside:

Last night before bed, I started the poolish for a French bread. Usually, my routine is to let the poolish go for about 7 hours then refrigerate it to retard the yeast. Last night, however, I decided to let the poolish go overnight, then I would wake up early to make bread. Upon a brief back-calculation, I learned that to have bread ready for a visit to a friend this morning, I would have to wake up at 5am to start the dough. Oh, to be the type of person who plans out projects before starting them. No matter - I was going to follow through with my plan. At 5, I woke up, started the dough, and by 5:30 I was back in bed. 7:30, the dough was formed, and by 9:30 the last loaf was out of the oven. One baguette went to our friend and the other was for us.

Now, back to the story. With this fresh bread in front of us, sandwiches were just a short logical hop. Now, what kind?

Our refrigerator solved that problem for us. Eggs. That was about the only sandwich-worthy foodstuff on the shelves.

I went online to find a hard boiled egg recipe - I have used so many over the years that I couldn't even keep them straight any longer. After a brief perusal of the available literature, I settled on this one from Adam Roberts, the Amateur Gourmet.

The Amateur Gourmet's Egg Salad Soliloquy, as modified by me.

6 eggs
mayo
Dijon mustard
salt
pepper
cayenne pepper
smoked paprika

Put the eggs into cold water and put the pot on the stove on high. When the pot starts to boil (I actually stopped at 90ºC), take the pot off the heat and let it sit for 15 minutes (not about 15 minutes, but exactly 15 minutes. If one is going to be particular about the cooking time, punctuality can be expected, no?). After 15 minutes, place eggs into a bowl of ice water to stop the cooking. Let them cool down for a few minutes, then peel.

Here is where this recipe sold me: instead of mashing the eggs, they are finely cubed with a knife. It gives the egg salad a different texture, as the yolks do not totally dissolve into the mayo.

Put all of the egg into a bowl, add a tablespoon of mayo, salt, pepper, spices, and mustard. Mix and eat.

I broiled the sliced baguettes to get them a bit crunchy, then built our lunch. I was quite happy with the outcome - the smoked paprika give it a bit of sweetness that was unexpected but nice.

I think this may become my standard egg salad. While it didn't have the spicy tang of Tabasco that my mom's has, it still produced the nostalgic pang that makes egg salad such a fulfilling dish.

I just found out that this is my 100th post. And it only took 3 years!

Tuesday, July 15, 2008

Kitchen Still Life


Kitchen Still Life
Originally uploaded by monkeycat!.
A snapshot of life in our kitchen.

Sunday, June 01, 2008

Tasting: 1986 Wines

This weekend, I had the chance to sit for a very nice tasting.

1986

1986 Beringer Private Reserve, Napa Valley, CA
1986 Cos d'Estournel, St. Estephe, FR
1986 Gruaud-Larose, St. Julien, FR
1986 La Jota Howell Mountain, Howell Mountain, CA
1986 Chateau Léoville Las Cases, St. Julien, FR
1986 Chateau Margaux, Margaux, FR
1986 Mondavi Reserve, Napa Valley, CA
1986 Chateau Montelena Estate, Napa Valley, CA
1986 Chateau Mouton Rothschild, Pauillac, FR
1986 Joseph Phelps Eisele Vineyard, Napa Valley, CA
1986 Chateau Pichon-Lalande, Pauillac, FR
1986 Chateau Talbot, St. Julien, FR

It was great - my favorites were the Mouton Rothschild and the Cos d'Estournel.

Tuesday, May 27, 2008

A night at Billo's House

After tasting 13 wines from Burgundy and California at the VITIS Burgundy tasting last week, a few of us headed to Billo's house for a relaxing night of wine tasting.

Here is the list of wines we enjoyed.

1995 Domaine Beaurenard Chateuneuf-de-Pape
2001 Turley Petit Sirah, Library Vineyard, Napa Valley
1992 Hess Collection Cabernet Sauvignon, Napa Valley
1993 Hess Collection Cabernet Sauvignon, Napa Valley
2003 Hess Collection Mountain Cuveé, Napa Valley
1988 Delicato Cabernet Sauvignon, Napa Valley
2004 Ridge York Creek Zinfandel, Sonoma
2005 Frank Family Zinfandel, Napa Valley
1999 Argyle Brut
2004 Chateau Pesquié Quintessence
1999 James Irvine Merlot, Eden Valley
2005 HdV Syrah, Los Carneros
2004 Lamborn Family Zinfandel, Howell Mountain
1994 Chateau Montrose
1994 Phillip Togni Cabernet, Napa Valley

and the last wine I missed :(

1977 Gould Campbell Vintage Port

Another great night.

Thursday, May 01, 2008

1926 Mouton Rothschild


1926 Mouton Rothschild
Originally uploaded by monkeycat!.
A 125L Savor Wine. I'd be willing to bet that I won't taste this wine again. Old...very old. Tasted like cigars, leaves, and soy with just a glimmer of fruit. Apparently not a good Bordeaux year, either.

Tuesday, April 15, 2008

Pasta with Garbanzo Beans, Chorizo, and Bread Crumbs

Mark Bittman's blog at NY Times, Bitten, has become one of my go-to places for weeknight dinner ideas. Although I love to cook, I haven't had much time to explore the kitchen lately. I am tackling data analysis for my Master's thesis; I think I have made 100+ graphs in the last 2 days.
But, overworked or not, I still love to cook. This article came across my feed reader yesterday describing a recipe for pasta with garbanzo beans, chorizo, and bread crumbs. It sounded great and Antonia was on board, so tonight I made it.

Pasta with Garbanzo Beans, Chorizo, and Bread Crumbs
by Mark Bittman

salt and pepper
olive oil
1/4 lb cooked chorizo sausage (I used two fresh sausages from Nugget Market)
1 tbsp minced garlic
1 cup fresh bread crumbs (hooray for the food processor)
4 cups cooked chickpeas/garbanzo beans with their liquid (I used two cans, one drained, one not drained)
1/2 lb cut pasta (I used 1 lb. large shells)
chopped parsley (None in the fridge, I used dried parsley)

Since I started with fresh, uncooked sausage, I had to cook the sausage first. I did this on a cast iron skillet over medium heat. Once the sausages were cooked, I set them aside. In the same skillet, I added 1 tbsp olive oil and added the garlic. I gave it a 1-2 minute hot oil bath and just as it started to change color from yellow to gold, I added the bread crumbs.

The pan was turned down to medium-low and the crumbs were stirred until they turned a deep deep gold, almost brown proper. I didn't let them burn, but they were teetering on the edge. I find the best cooking-derived flavor (as opposed to ingredient-derived flavor) comes when the food is balanced on the edge of browning and .... more than browning. Once the bread crumbs were done, I put them aside.
Sausage and bread crumbs

After letting the sausage cool a bit, I cut it up and gave it another run in the pan, just to make sure the insides were cooked.

Cooking is very relaxing for me, despite what people who have been around me when I cook will say. The serenity of cooking is furthered by some music (I listened to The Miseducation of Lauryn Hill and Bizarre Ride II the Pharcyde) and a glass of wine. I am down to my last few bottles of Rd 29, so this was a treat to myself.

Road 29, almost the end

Next, the pasta water is boiled and salted, and the pasta goes in.

Pasta in the pot

While the pasta is boiling, the garbanzo beans went into a large skillet with a few tablespoons of olive oil. One of the cans of beans was drained, the other was not. While they simmered with the olive oil, they received a dusting of salt, pepper, and dried parsley.

Simmer beans

When the pasta is maybe 2 or 3 minutes from being ready, drain it out of the water and add it to the garbanzo beans to finish cooking with the sauce. This will let the flavors of the sauce soak into the pasta, as well as have the starch from the pasta thicken the sauce.

Mix pasta with garbanzo beans

After the pasta is cooked through (sample prodigiously while cooking; it is bar-none the best perk of spending time in the kitchen) add the chorizo and toss (carefully).

Add Sausage

Tossing the pasta

It's done! Sprinkle with the breadcrumb mixture and eat.

Thank you, Mr. Bittman.

Sunday, April 06, 2008

A Day of Bread


A Day of Bread
Originally uploaded by monkeycat!.
Noble Pig asked me, in the comments on one of my previous posts, where's the bread?

Here it is, Mrs. Pig. Three loaves of Rustic Bread, and a big stack of naan. The bread had a wonderfully dark crust that almost took on a caramelized sweetness. It also had a nice crunchy crust with a soft, stretchy crumb. I had quite of bit of leftover biga pre-ferment, so while the bread was proofing and baking, I mixed the biga with water and flour to make an ersatz naan dough. It wasn't traditional, but it did the job.

We had bread for a week from this bake-a-thon - I even sent out a mass email to a student group offering a loaf of bread to the first person who could get to our house to pick it up; there was no way Antonia and I could eat three loaves of bread before they went stale. A loaf of the bread when to a good home within the hour.

Friday, April 04, 2008

Wines, Week 1


Old Cork
Originally uploaded by monkeycat!.
This quarter, I am one of the teaching assistants for VEN 125L - Sensory Evaluation of Wines. During the labs, students are introduced to sensory techniques for wine evaluation - difference testing, reference standards, etc. At the end of each lab, the students are given 6 wines to try - these wines are termed savor wines (savor wines from last year).

Week 1 were oxidized white wines. All of the wines were old, but each had a different "old wine" character. Some where outright spoiled, while others had hints of life left in them. All of the wines were tasted blind.

Week 1 - Unintentionally oxidized white wines

1986 Wente Napa Valley Fumé blanc - ethyl acetate, acetaldehyde.

1988 Stag's Leap Wine Cellars Napa Valley Chardonnay, Beckstoffer Ranch - chalk, acetaldehyde

1990 Jordan Alexander Valley Chardonnay (375mL) - honey, Lyle's Golden Syrup

1991 Alderbrook Dry Creek Semillon - plastic, grapey, phenol, floral

1992 Van Der Heyden Vineyards Napa Valley Chardonnay - acetaldehyde, lemon, soy, brothy/meaty, ashy, boiled mushrooms

1996 Louis Martini Napa Valley Sauvignon blanc - green tea/olive oil, fruity flavors

My favorites were the Jordan (in splits!) and the Alderbrook Semillon. I was pleasantly surprised that some of these wines still had something left - I wouldn't call what was left "life", but there is a spark of something. Other wines, like the Wente and Stag's Leap, were just plain dead.

I look forward to next week's tasting, though I'm not sure what it is.

Friday, March 28, 2008

A weekend of food and Rigatoni with Spinach and Green Beans

I am now technically 5/6 done with grad school. I say technically, because I will be finished with grad school when my thesis is finished, not when classes are over. Nonetheless, it feels like school is winding down.

This last quarter, Winter Quarter 2008, was quite busy. I was TAing for Wine Stability with Dr. Boulton while at the same time carrying out the sensory portion of my thesis research. I spent hours on end holding wine glasses up to blindfolded students' noses. I am glad that data collection is almost complete.

March 24-28, 2008 is when Spring "Break" was scheduled for this year. "Break" is in quotation marks because there really was no break in the traditional sense for me. I was in the lab every day working on my thesis. I have been working on the Methods and Literature Review sections. I think I made some good progress in the quite of the Break-time lab.

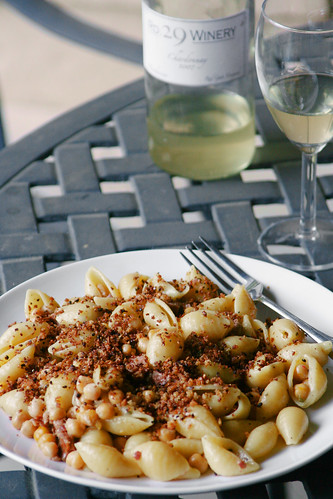
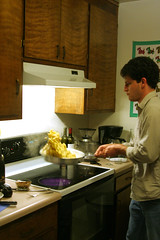
A second, tastier consequence of "Break" is that it once again gives me time to do some cooking.

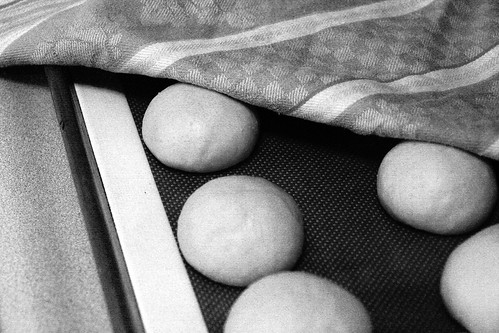
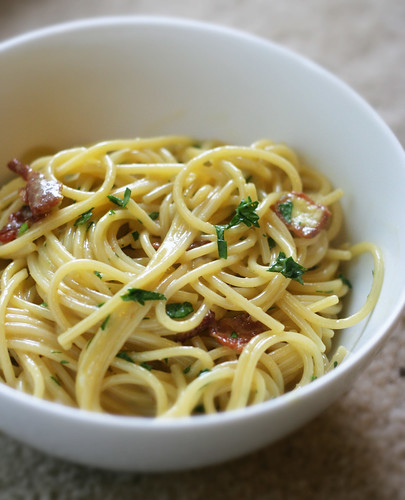
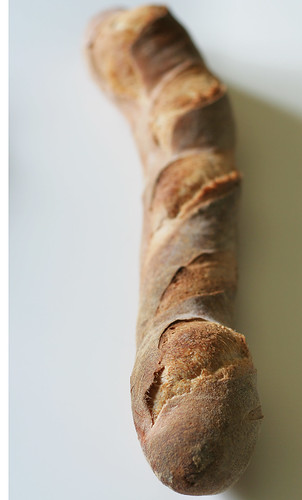
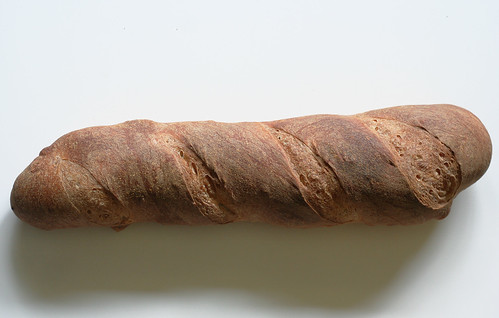
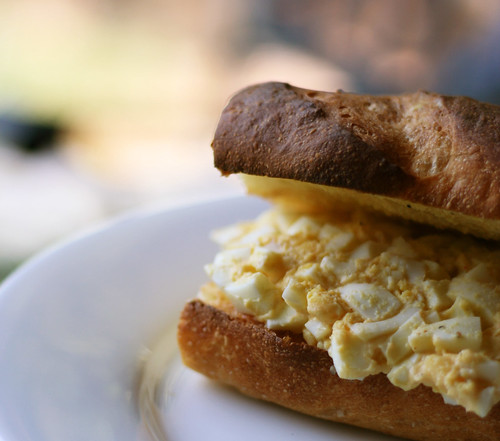
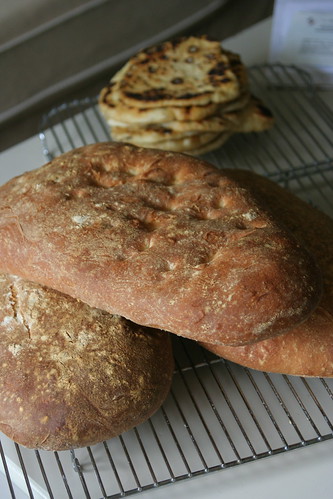
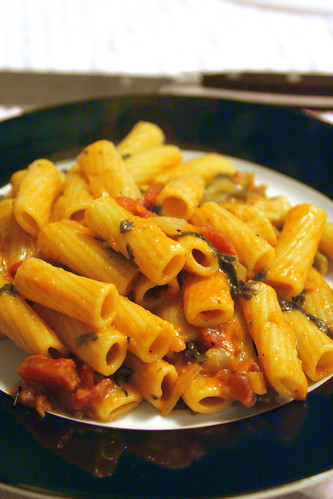
Last night for dinner, I made the pasta pictured above (recipe to follow). This morning, after I began my one day stint as a dogsitter, I started to work on bread. Oh break, I have missed you so. There really is nothing like kneading dough. It is therapeutic in a way very few other activities are. I have been making bread out of Curst and Crumb by Peter Reinhart. I recommend anyone who wants to get into bread baking pick up this book or one of Mr. Reinhart's other books.

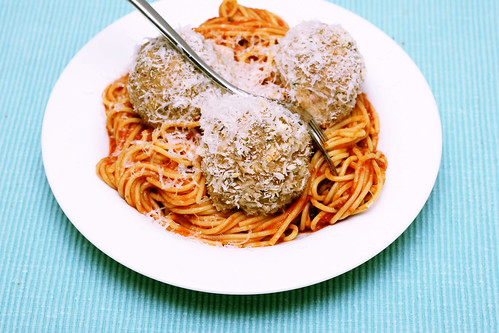
Tomorrow, I am going to pick up some ground beef from Mr. Bledsoe at the Davis Farmers Market and will make some kreplach. I may not
fry them as per the NYT recipe, but who knows.

Any any event, it has been nice to be able to cook and blog again; hopefully it won't be so long until I do it again.

Rigatoni with Spinach and Green Beans

1 lb dried rigatoni
2 tbs olive oil
1 big handful of green beans, trimmed and cut in half
1 big handful of frozen spinach
1/2 yellow onion, sliced thin
paprika
garlic powder (I'm out of garlic - who knew that could happen?!?!)
dried thyme
dried fennel
cayenne pepper
salt
pepper
1 can diced tomatoes
2 big tablespoons of hummus

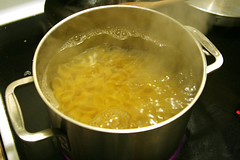
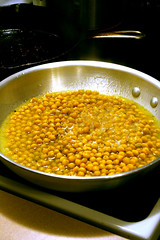
Start pot of water boiling. In the mean time, heat up a large skillet or pot with olive oil on medium high. When the oil is very hot and moves about the pan with little resistance, add in the onions and green beans. Turn down heat to medium and let soften.

When the water comes to a boil add a big pinch of salt (big!), add the pasta.

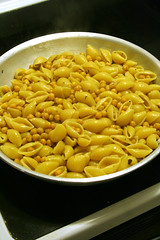
After about 6-8 minutes, add in the spinach and the spices. When the spinach has unfrozen and incorporated, add the hummus. This gives the sauce body without adding cream or butter. Once that cooks for a minute or two, add in the diced tomatoes. Let these cook for a few minutes. If the pasta is already in the water, add about a cup of the pasta water to the sauce. The starch in the pasta water will help to firm up the sauce. If the pasta is not in yet, don't worry; just add the water.

Keep the sauce simmering over medium-low, allowing it to reduce and concentrate. Add back a little bit of pasta water if the sauce gets to thick. Adjust salt and pepper to taste.

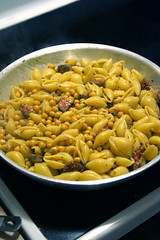
When the pasta is just about finished (maybe 1 minute before you would normally take it off), add it into the sauce and let them cook together. This will allow some of the sauce flavor to infuse into to pasta.

I finished the sauce with a little bit of Pecorino cheese. It was a very fulfilling meal which I am about to go eat for lunch.

Sunday, January 27, 2008

Weekend Re-cap

This weekend was quite productive for me. I was able to:

1) Can the walnut butter that I had made
2) Bake 2 loaves of bread
3) Make 4 quarts of chicken stock
4) Read, cover to cover, In Defense of Food: An Eater's Manifesto by Michael Pollan.
5) Catch up on sleep.

On #4, I recommend that everyone go as soon as possible to the library or bookstore and pick up this book. The food that we eat is a subject that needs to be sorted out and I think this book goes a long way to clarify things.

Walnut Butter Jars


Walnut Butter Jars
Originally uploaded by monkeycat!.
Last week on Tuesday the Pomology Department, which shares Wickson Hall with the Viticulture and Enology Department, put out walnuts for people to take home. There must have been 50-100 lbs of walnuts. I took home a few bags worth, spent the next two days shelling them, and turned them into walnut butter. As you may note by looking below, there is not much to making nut butters.

After making the walnut butter, I put it in jars, made a label and a little tag, which more or less includes what is stated in the preceding paragraph.

Walnut Butter

walnuts, lightly toasted (7-10 min in a 250ºF oven)
walnut oil (or peanut, olive, etc.)
salt (optional)

Place walnuts in food processor. Blend until it forms a paste, and add a little bit of the oil to fix the consistency. Add salt if you desire.