Orecchiette alla Antonia: A step-by-step how to
Remember when your English teacher told you never to start an essay with "This essay is about...." They are probably correct. I am going to respectfully ignore their collective advice.
This post is going to be a step-by-step guide on how I made a dish that I think is good enough to carry Antonia's name. (Disclosure: The other reason that the dish carries Antonia's name is that she made the sauce.)
There are two parts: The sauce and the pasta. We started both at the same time. Most of the pictures that I was able to take are of the pasta, not the sauce, unfortunately.
Sauce
Step 1: Chop up one medium onion and one carrot fine. Heat up 2 tbs margarine (we are generally a milk-free household) and 2 tbs of olive oil together in a pot. Once hot, add the onions and carrots and sautee for 2 minutes.
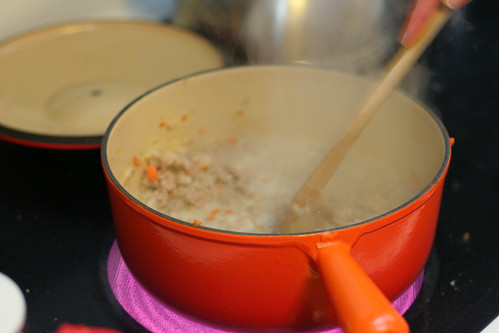
Step 2: Add 1 lb of ground turkey, stirring for 2 minutes until meat is brown. Add some salt and pepper. This can always be adjusted later.
Step 3: Add 1/2 c soy milk and 1/2 c water and a little bit of nutmeg. Cook down until the liquid is mostly gone. Add 1 c dry white wine (we used Sauvignon blanc, a wine usually good for cooking, in my opinion). Again, cook down until mostly evaporated.
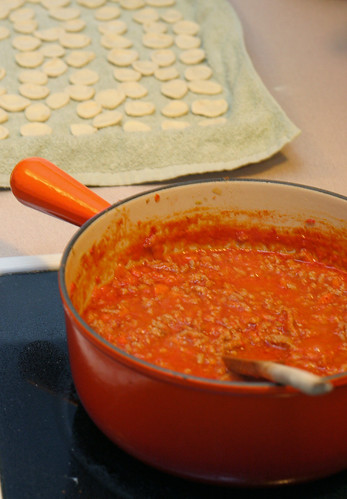
Step 4: In a blender, coarsely puree a 28 oz can of whole tomatoes with the juice. Add tomato puree to sauce and lower heat to a very low simmer for 1 1/4 to 1 1/2 hrs. Stir occasionally.

At this point, the pasta can be started.
Pasta
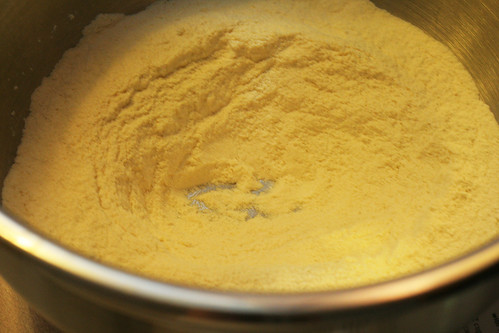
Step 1: Add 2 c semolina flour and 2 c all-purpose flour to a large bowl and mix it up.

Step 2: Make a well in the center of the flour mixture and add 1 c lukewarm water and a big pinch of salt. Using a fork, slowly incorporate the flour into the water, forming a dough. Not all of the flour will incorporate.
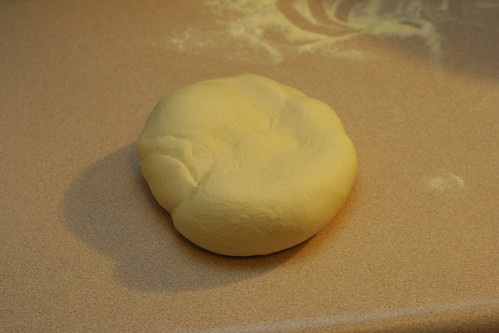
Step 3: Turn out what dough did form onto a surface. Knead the dough for 8-10 minutes, adding in as much flour as the dough will take (I have never really understood what that means - I can keep adding flour and kneading until it forms a brick, so I guess it is a matter of practice). Knead the dough until it is smooth and elastic.
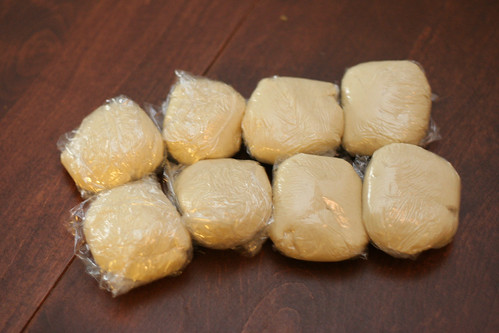
Step 4: Cut up the dough into 8 equal pieces and individually wrap the pieces in plastic wrap.
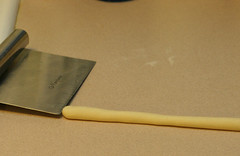
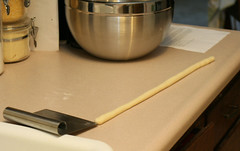
Step 5: One at a time, unwrap the dough balls and using any way that is comfortable, turn the ball into a log 1/2" wide and as long as possible (I could get to about 2' with the amount of dough I had).
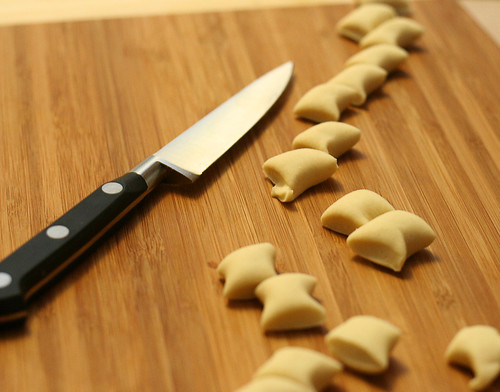
Step 6: Cut the dough log into 1/2" pieces, being careful to separate them and not let them touch. Adding a little bit of the extra flour may help.
Step 7: Take a dough nugget and with floured hands, put the cut side down into your palm. Make a depression with your other thumb, doing a slight twist at the end. It took me a long time to figure out the appropriate pressure to make a good depression but not get the dough to stick to my hands.

Step 8: Place the little ears on a towel on a sheet pan. A little flour on the towel can't hurt.
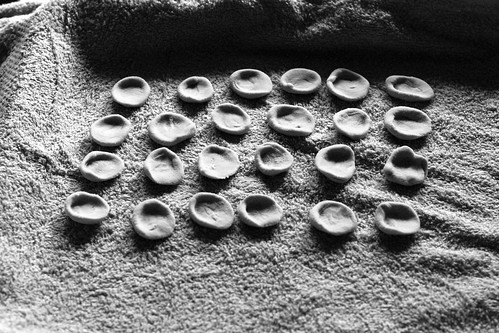
....Continue with all of the balls of dough....
Step 9: Wait until the sauce is done. You are in the home stretch! Get a pot of salted water boiling. Once boiling, add in the ears about 20 at a time. They only take 1-2 minutes. They will be done once they are floating. Add them into a bowl some of the sauce.
Step Done: Eat!

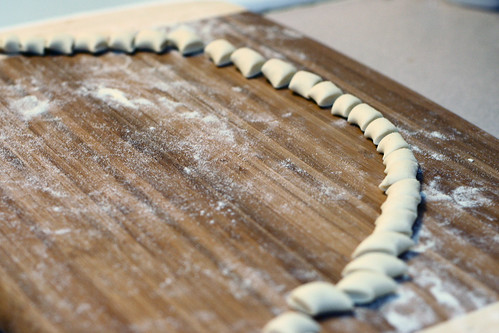
One last picture, just because I like it. This was the last log of dough after I cut it up.
If these recipes look familiar to you, you must read a lot of food magazines! They in fact did come from epicurious.com. We modified the sauce and the pasta is basically by the book.
This post is going to be a step-by-step guide on how I made a dish that I think is good enough to carry Antonia's name. (Disclosure: The other reason that the dish carries Antonia's name is that she made the sauce.)
There are two parts: The sauce and the pasta. We started both at the same time. Most of the pictures that I was able to take are of the pasta, not the sauce, unfortunately.
Sauce
Step 1: Chop up one medium onion and one carrot fine. Heat up 2 tbs margarine (we are generally a milk-free household) and 2 tbs of olive oil together in a pot. Once hot, add the onions and carrots and sautee for 2 minutes.
Step 2: Add 1 lb of ground turkey, stirring for 2 minutes until meat is brown. Add some salt and pepper. This can always be adjusted later.
Step 3: Add 1/2 c soy milk and 1/2 c water and a little bit of nutmeg. Cook down until the liquid is mostly gone. Add 1 c dry white wine (we used Sauvignon blanc, a wine usually good for cooking, in my opinion). Again, cook down until mostly evaporated.
Step 4: In a blender, coarsely puree a 28 oz can of whole tomatoes with the juice. Add tomato puree to sauce and lower heat to a very low simmer for 1 1/4 to 1 1/2 hrs. Stir occasionally.
At this point, the pasta can be started.
Pasta
Step 1: Add 2 c semolina flour and 2 c all-purpose flour to a large bowl and mix it up.
Step 2: Make a well in the center of the flour mixture and add 1 c lukewarm water and a big pinch of salt. Using a fork, slowly incorporate the flour into the water, forming a dough. Not all of the flour will incorporate.
Step 3: Turn out what dough did form onto a surface. Knead the dough for 8-10 minutes, adding in as much flour as the dough will take (I have never really understood what that means - I can keep adding flour and kneading until it forms a brick, so I guess it is a matter of practice). Knead the dough until it is smooth and elastic.
Step 4: Cut up the dough into 8 equal pieces and individually wrap the pieces in plastic wrap.
Step 5: One at a time, unwrap the dough balls and using any way that is comfortable, turn the ball into a log 1/2" wide and as long as possible (I could get to about 2' with the amount of dough I had).
Step 6: Cut the dough log into 1/2" pieces, being careful to separate them and not let them touch. Adding a little bit of the extra flour may help.
Step 7: Take a dough nugget and with floured hands, put the cut side down into your palm. Make a depression with your other thumb, doing a slight twist at the end. It took me a long time to figure out the appropriate pressure to make a good depression but not get the dough to stick to my hands.
Step 8: Place the little ears on a towel on a sheet pan. A little flour on the towel can't hurt.
....Continue with all of the balls of dough....
Step 9: Wait until the sauce is done. You are in the home stretch! Get a pot of salted water boiling. Once boiling, add in the ears about 20 at a time. They only take 1-2 minutes. They will be done once they are floating. Add them into a bowl some of the sauce.
Step Done: Eat!
One last picture, just because I like it. This was the last log of dough after I cut it up.
If these recipes look familiar to you, you must read a lot of food magazines! They in fact did come from epicurious.com. We modified the sauce and the pasta is basically by the book.